How to Filter Products by Custom Attribute in WooCommerce (2023 Guide)

Want to set up filtering by custom attributes for your WooCommerce store? Custom attributes are a great way to organize your products and make them more searchable. In this post, we’ll explore how to filter WooCommerce products by custom attribute in WooCommerce.
What are custom attributes and why should you enable filtering by custom attributes?
Product attributes are a set of features that define a particular product in your eCommerce store. They include size, color, price, product type, and other features relevant to the product. Shoppers look at these attributes in making their purchase decision.
WooCommerce allows you to create global attributes and custom attributes. Global attributes are common attributes that you can apply to all the products in your catalog. These can be applied to your existing products and any new products you add to your site.
Custom attributes also describe product features, except they are used for a specific product and won’t be applicable to other products in your catalog. You can create a custom attribute to represent any extra information that describes your product more accurately, such as product size and color, or ingredients and nutritional information.
Advantages of using custom attributes
Adding more product information and allowing customers to filter the information is beneficial for a number of reasons:
- To speed up product searches: According to an eCommerce study by Nielsen Norman Group, 20% of purchase failures arise from missing or unclear eCommerce product attributes or information. Including custom attributes for your products allows your shoppers to filter your catalog based on their personal product preferences, and find what they’re looking for quickly.
- To make it easier to browse customizable products: Adding custom attributes is particularly useful if you sell customizable products like apparel or stationery that are available in different colors, sizes, styles, designs, and materials, to name a few. For example, buyers will want to know whether you have a T-shirt in their size and preferred color, or if you carry letter-size and legal-size file folders in your stationery catalog.
- To appear more professional: Providing filters to search by custom attributes tells buyers that you’ve organized your products effectively and made them more searchable. These efforts will make your store look more professional and create positive impressions about your business.
- To lift sales: Studies have documented how offering additional product variations will increase consumers’ purchasing decisions. Ensuring that specific attributes of those variations are displayed is beneficial as it will influence shoppers’ perceptions of the product choices at your store and improve the shopping experience, both of which can help boost sales.
How to enable filtering by custom attributes
WooCommerce comes with built-in filtering options, but you cannot add custom attributes as filters. The limitation makes it difficult for customers who want to filter by a specific attribute, which can potentially harm user experience and sales.
The best way to enable filtering by custom attributes is to use a plugin like Acsell Product Filters. This WooCommerce plugin is the fastest, most comprehensive product filter plugin offering this functionality. Acsell Product Filters uses advanced Ajax technology for instant filtering and edge caching to maintain fast speed even during spikes in website traffic. Product counts associated with filter values update dynamically as attribute filters are selected. So, shoppers will be able to find what they want in seconds, and also see the correct number of products available for each search.
Easy filtering is as important as fast filtering – you can achieve it by presenting product filters in familiar ways. For example, you may prefer to use a price slider rather than a price range or a toggle switch instead of radio buttons. Acsell offers every filtering mechanism, from dropdown, ranges, and switches, to link boxes, checkboxes, and sliders. As the plugin was developed with a sharp focus on UX, you also get features like accordion settings, truncated filter lists, and search boxes for many filter values.
With Acsell, you can create global, mobile-specific, page-specific, and desktop-specific filter sets, and select from lazy load, pagination, and ‘Show More’ options. The plugin supports multiple languages and currencies, so you can cater to international audiences as well.
Let’s see what creating custom attributes involves and how to filter WooCommerce products by custom attribute using Acsell.
Step 1: Create custom attributes
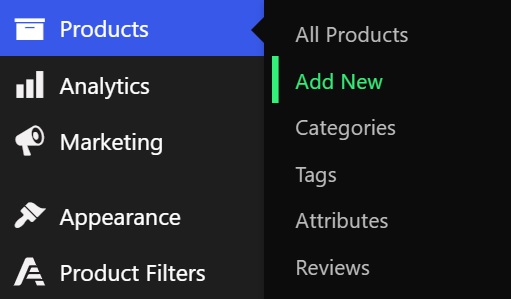
1. Under ‘Products’ on the left menu bar in your WP dashboard, you’ll see options to add a new product or edit an existing one. Choose either and scroll down to the ‘Product data’ section.
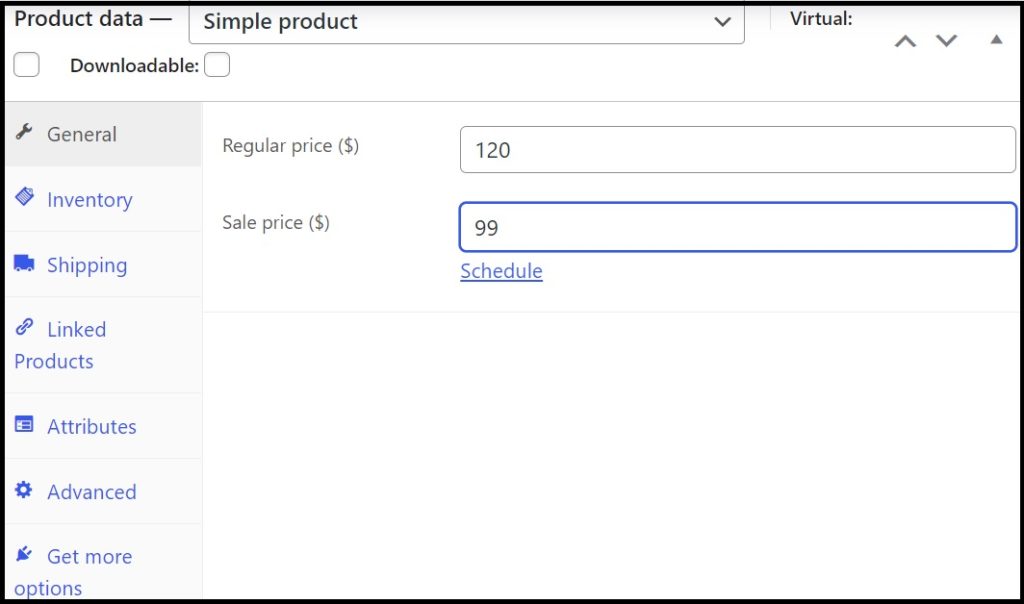
2. Next to ‘Product data’, choose ‘Simple Product’ or ‘Variable Product’. Add the relevant information under ‘General’, ‘Inventory’, ‘Shipping’, and ‘Linked Products’.
3. Under ‘Attributes’, choose ‘Custom Product Attribute’ in the dropdown menu and click ‘Add’. This will bring up the custom attribute section.
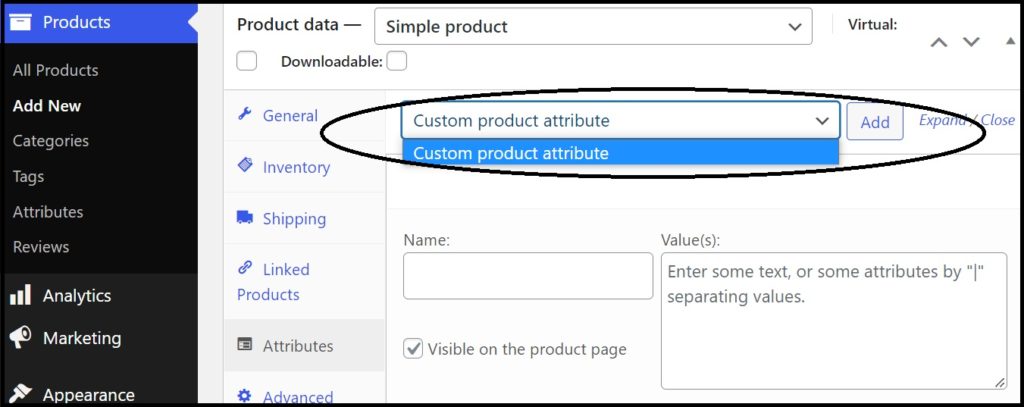
4. Now, you can enter the attribute name and associated values. For example, you can add ‘collar’ as an attribute and ‘shawl’, ‘spread’, and ‘wing tip’ as values. The values need to be separated using ‘|’ (vertical line on your keyboard).
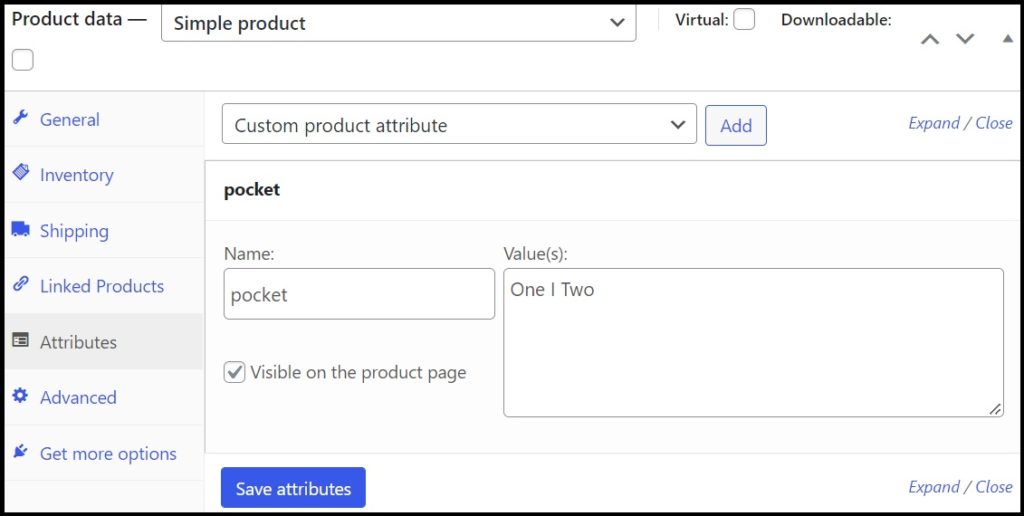
5. You’ll see the options ‘Visible on the product page’ and ‘Used for variations’. The latter is the default option, indicating that the custom attribute will be displayed on the product page. If you’re adding product variations, then select the other checkbox. After this, go to ‘Variations’ on the left menu to create variants.
6. Click ‘Save’ to save the attributes for the product. You can check to see if it appears on the product page.
Step 2: Use Acsell to enable filtering by custom attributes
- Create an Acsell account and download the plugin installation file.
2. On your WordPress dashboard, navigate to ‘Plugins’ on the sidebar menu, click ‘Add New’ and then click ‘Upload Plugin’. Select the plugin installer. It will normally be in your download folder, unless you’ve selected a different location on your device to download the file.
3. Install and activate the plugin.
4. Enter your license key when prompted. This will be emailed to you when you purchase Acsell. Finally, click ‘Agree & Activate License’.
5. The Product Filters page will open and the plugin initialization process will begin, following which the page will display the Config Wizard. The Config Wizard will help you create a filter set.
Configure your initial filters
- Select options relevant to your product from brand, color, size, material, and product tags, and other variables such as price, availability (‘In Stock’), level of discount, and product promotion (‘Sale’).
- The values for each type of attribute will be automatically applied. For example, for ‘size’, the plugin will show values like ‘6, 7, 8, 9…’.
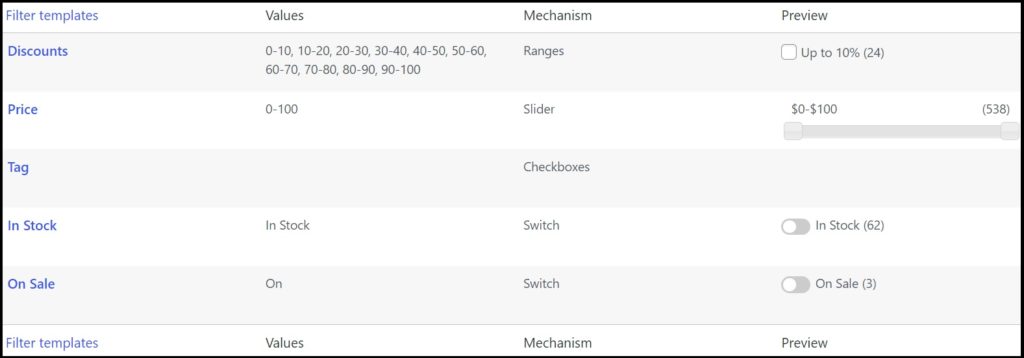
- A list of filter mechanisms will be displayed based on the type of attributes chosen. The mechanisms include checkboxes, link boxes, dropdowns (single-select and multi-select), ranges, sliders, and swatches.
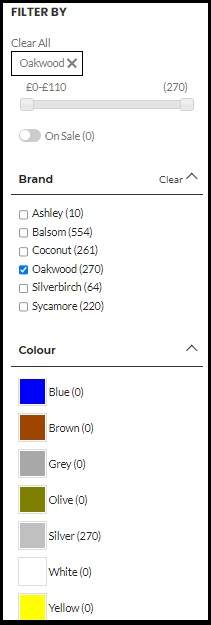
- You can see a preview of your filters as they will appear on the web page sidebar. By default, the number of matching products will be displayed in brackets next to each filter choice. You can remove it by unticking ‘Display Product Counts’.
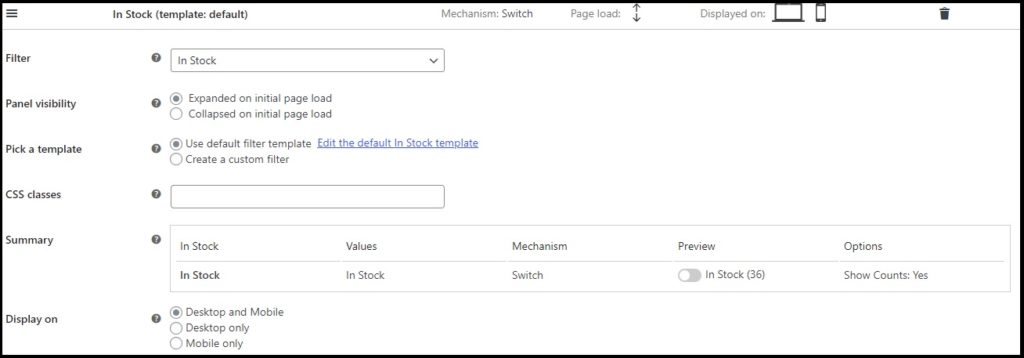
You can define a filter template for each filter type. While you can only define one default filter template for each type of filter, it is possible to override the default template and create a custom filter.
Publish filters to your store pages
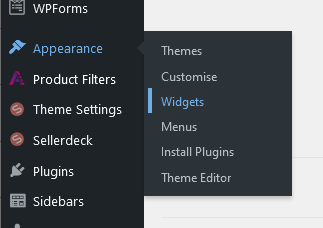
- 1. In the WP Admin menu, go to ‘Appearance’ and select ‘Widgets’.
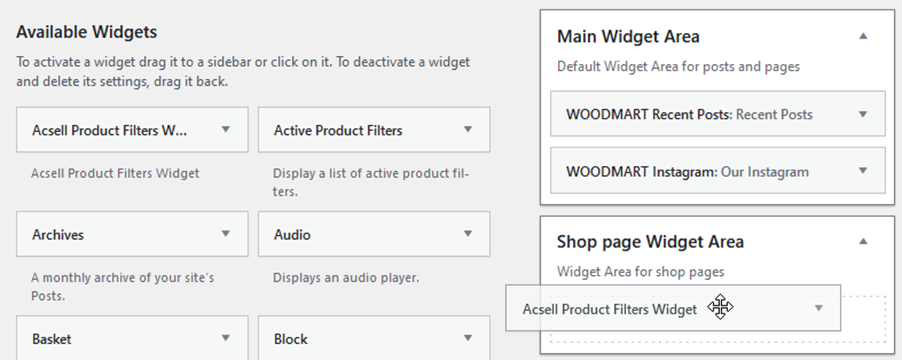
- 2. If your site is using the classic Widgets editor, then:
- In the list on the left-hand side of the page, click ‘Acsell Product Filters Widget’. Next, select the page area for your Shop or Category pages.
- Or, you could simply click and drag the ‘Acsell Product Filters Widget’ into the appropriate page area, and click ‘Done’.
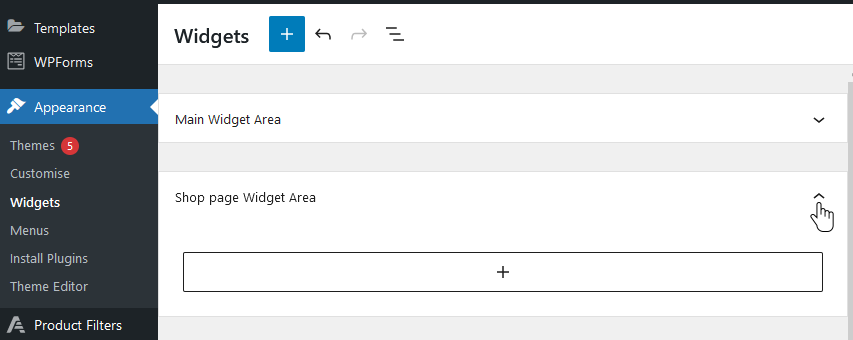
3. If your site uses the Block Editor, then:
- Scroll down to the ‘Shop Page Widget Area’ and expand it.
- Click ‘+’ and start typing ‘Acsell’ in the search box.
- When ‘Acsell Product Filters Widget’ appears, click it.
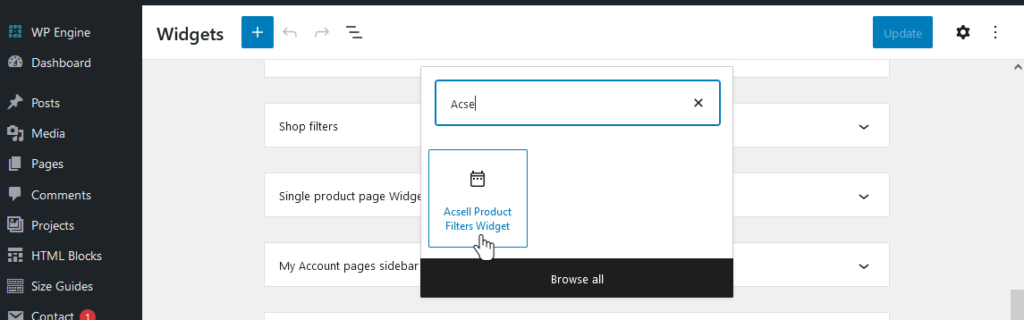
- Click ‘Update’.
Using Acsell, you can use advanced conditional logic, including ‘and’/’or’ statements to differentiate between independent filters. The feature is useful for shoppers looking to filter products by multiple attributes at the same time. The page will display only products with the selected attributes, enabling shoppers to find relevant products quickly. This is also helpful in reducing server calls as only relevant products are shown.
Acsell allows you to create unique dropdown menus by grouping different attributes using logic conditions. This feature is not available on any other plugin. You can include custom attributes to help shoppers narrow down their search to the exact product details.
Advanced filtering using Acsell Product Filters is easy
Custom attributes are used to filter products or create variations when adding variable products in WooCommerce. They’re especially useful when you want to display certain attributes linked to the products in your online store.
In this post, we’ve looked at how to add custom attributes in WooCommerce. We’ve also used Acsell to show you how to filter Woocommerce products by custom attribute. Product filtering refines product searches and improves the shopping experience, which can encourage visitors to spend a longer time on your site and increase the chances of a sale. Acsell Product Filters is the best Woocommerce product filters plugin for a number of reasons:
- It enables instant filtering through Ajax calls. Shoppers don’t have to deal with slow loading times or page refreshes.
- It has all filtering mechanisms and UX-focused features to enhance shoppers’ product search experience.
- It offers advanced features like conditional logic, a feature seen with no other plugin
- It’s easy to set up and use! A drag-and-drop interface makes adding and rearranging filters on your store pages as easy as it can get.
Ready to set up filtering by custom attributes on your site? Sign up for a 7-day free trial and see how much you can improve your user experience with Acsell Product Filters!